Receipt configuration
The Swedish regulations require the customer receipt to state if it is a sale receipt or a return receipt and if it is a reprint of the receipt. Therefore special variables need to be added to the form design of the customer receipt.
To fulfill the Swedish requirements you must follow these steps:
1. Swedish receipt
The LS One comes with a set of printable forms where the customer receipt is one of them. The Swedish regulations require some additional information being added to the standard receipt.
We provide a receipt in Swedish which includes all the require fields which you can import or you can add the required fields to your existing customer receipt.
- Download the Swedish receipt and unzip the download.
- Browse to the Sites > [Forms and labels] Form layouts
- Import the form you just downloaded.
Read this for further information about the form import and editing - In the form profile view (Sites > [Forms and labels] Form profiles)
- Select the Default form profile (or the one your store is using)
- In the lower list select the Receipt line and edit it
- In the Form profile line dialog select the Customer Receipt (SE) as layout
- Press OK
_Header_800x482.png)
The fields Terminal > Store address and Terminal > Store info 1 were added to the receipt to print all required store information.
The fields Sale > Sale text and Return sale > Return sale text have also been added to the receipt header. The field Return sale text is only printed when the balance of the receipt is negative and then the field Sale text is not printed.
The field Fiscal > Fiscal signature was also added to the footer section of the receipt.
_Footer_800x159.png)
The following information is required to be added to the customer receipt:
- Store address
- Corporate identity number or personal identity number
- The control unit's serial number
To add this information to the receipt:
- Go to Sites > [Forms and labels] Form layouts > Edit Customer receipt
- Decide on where to add this information. Either in the header of the receipt or the footer. Zoom into the selected section

- You can add lines to the existing receipt and then drag in the variables missing:
Information Variable Comment Store address Terminal > Store address This prints the address of the in one line separated by a , Corporate identity number or personal identity number Terminal > Store info 1 In the general configurations you added the corporate identity number into the Form info 1 field in the store view. Cash receipt header Sale > Sale text This text is only printed if the receipt amount is positive Return receipt header Return sale > Return sale text This text is only printed if the receipt amount is negative The control unit's signature Fiscal > Fiscal signature This prints the signature from the eTax control unit for this sale. 
See an example in the Importing the receipt section above.
You can use the Other > Text field to add labels to the new variable fields
2. Email receipt
According to the Swedish regulations the email receipt should say Electronic cash receipt or Elektroniskt kassakvitto
To have a different receipt for the email you need to create a copy of your customer receipt.
- Go to Sites > [Forms and labels] Form layouts > Edit the Customer receipt
- Press the add
 button to create the new receipt.
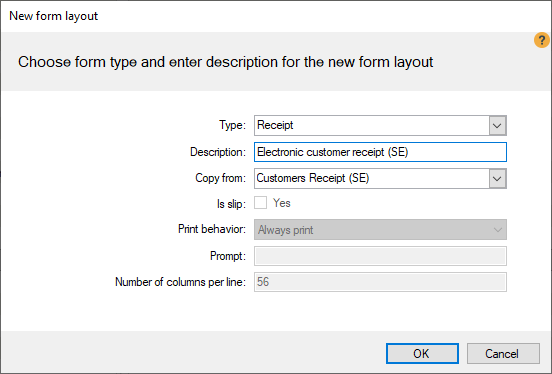
- Select Type: Receipt
- Enter a Description: Electronic customer receipt (SE)
- Select Copy from: Customers Receipt (SE), or the receipt that you edited in previous step.
- Press OK
- Zoom into the header section of the form layout editor.
Edit the text of the Sales text field (Kassakvitto). The field should now say Electronic cash receipt or Elektroniskt kassakvitto.
The text is edited by typing into the field.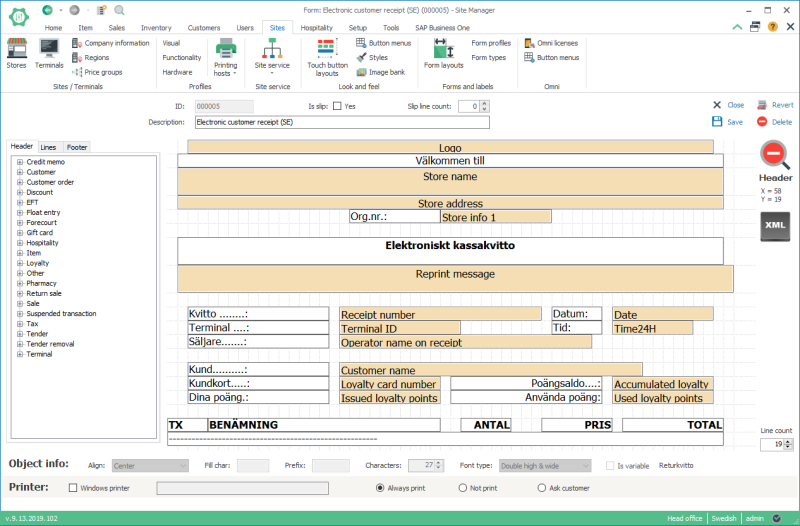
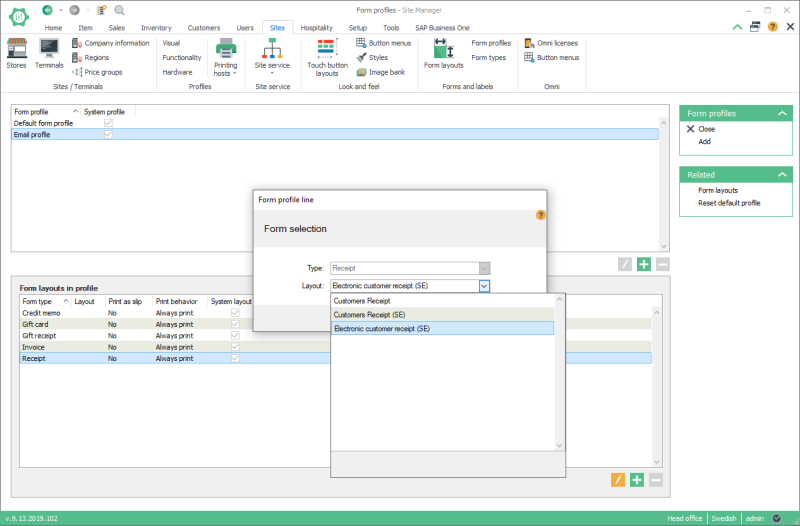
- Now open Sites > [Forms and labels] Form profiles
- Select the Email profile
- In the lower list edit the line with Form type: Receipt
- Select Layout: Email receipt
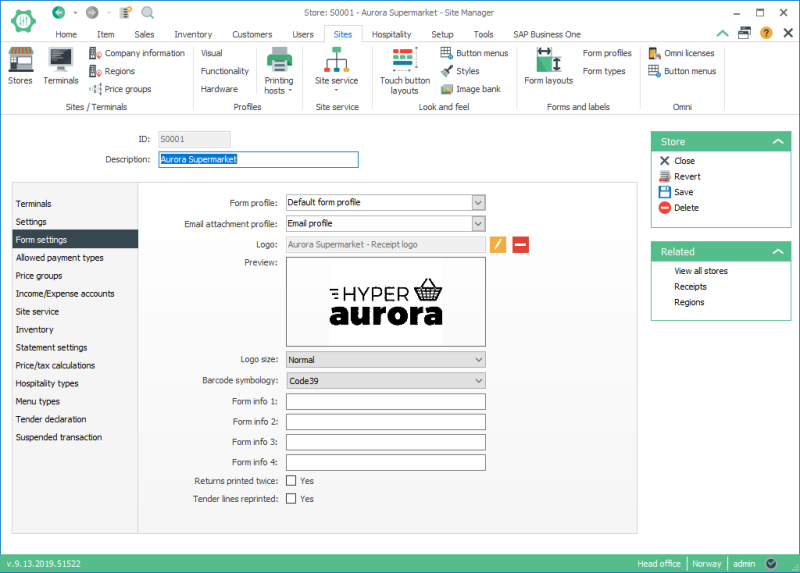
- Make sure the email form profile is selected for your store. Go to Sites > [Sites/Terminals] Stores
- Edit your store and open the Form settings tab
- Select the Email profile in the Email attachment profile field
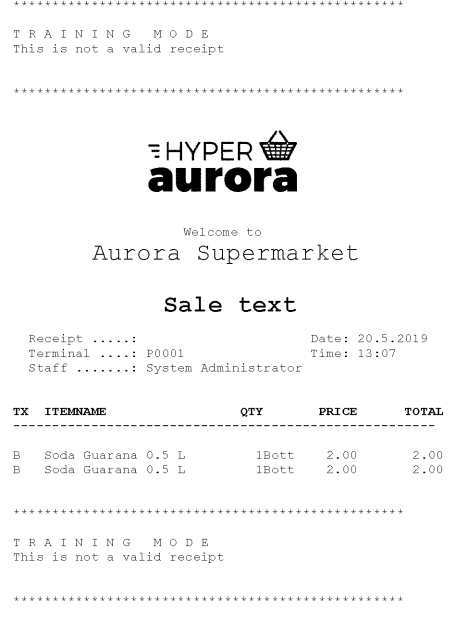
Training receipt
If the POS is in training mode the receipts are marked clearly in the header and footer of the receipt and the payment part of the receipt is skipped.

Now you should connect and configure your eTax device at the terminal.

